
 |
| Credit |

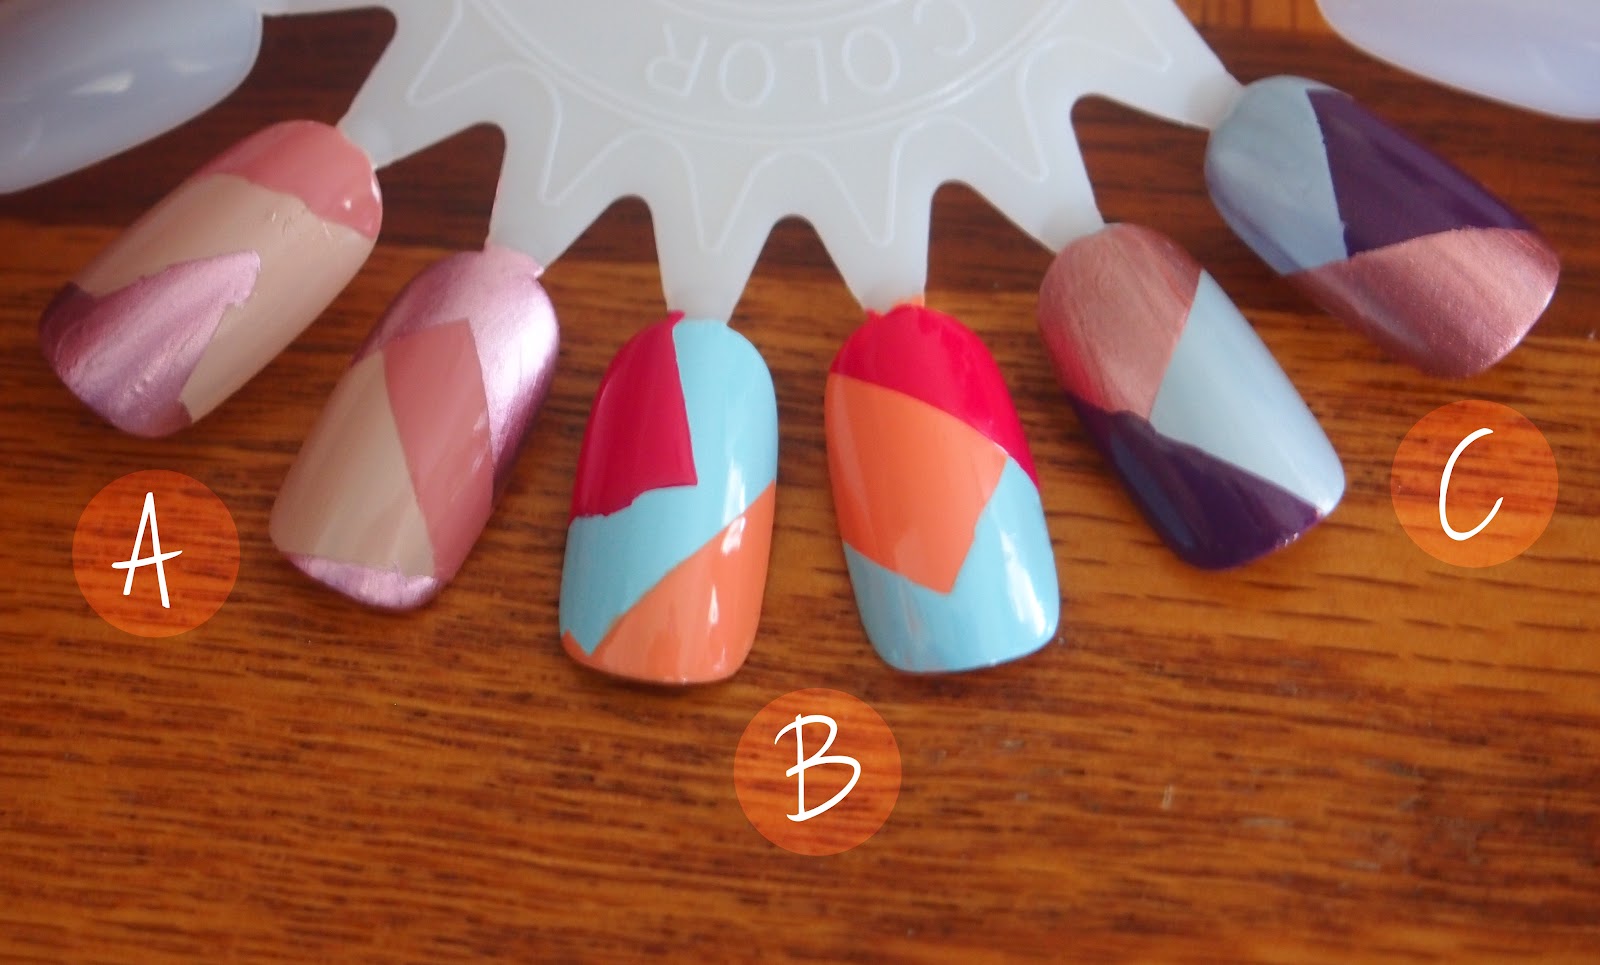
Colorblocking! It's such a trend right now, it's not even funny. I know, my recreation is nothing like the model's. I didn't want to get too creative, and wanted to keep the design simple for this tutorial. It is time consuming, but is really worth it when the whole look it put together. The last image are a few design and color combination ideas that I came up with. If you think three is too much, you can always stick with two. Remember, this is your look, do what you want with it! Here are some color blocking pairs that I thought of earlier this year: -Click!-
Step 1: Prep and Prime
Prep nails with your favorite basecoat, which helps polish adhere longer and prevents your nail beds from being discolored by dark lacquers.
Prep nails with your favorite basecoat, which helps polish adhere longer and prevents your nail beds from being discolored by dark lacquers.
Step 2: Pick Your Polish and the First Coat
Select a few complementary polish colors. For the best visual impact, choose one light or pastel polish, one dark or neon polish, and one metallic. The more opaque they are, the better. Then start with the lightest color and paint one coat over all ten nails. (Since you’re layering polishes, it’s easier to cover light with dark than the other way around.) If your lightest color is sheer, paint two coats. Let the polish dry completely.
Select a few complementary polish colors. For the best visual impact, choose one light or pastel polish, one dark or neon polish, and one metallic. The more opaque they are, the better. Then start with the lightest color and paint one coat over all ten nails. (Since you’re layering polishes, it’s easier to cover light with dark than the other way around.) If your lightest color is sheer, paint two coats. Let the polish dry completely.
Step 3: Grab a Roll of Scotch Tape and the Second Coat
The secret to the sharp lines of this manicure is Scotch tape. Grab a roll and tear off a few nail bed-sized pieces of tape. Before applying them to the nail, take each piece and press it against your palm several times to remove most of the stickiness. Then, once the first coat is dry, place a de-stickified piece of tape at a diagonal angle across each nail. Next, grab the dark color and paint each nail again. You’ll be painting partially over the nail and partially over the tape. When you’re done, gently remove the pieces of tape and let the polish dry. (Make sure to remove the tape before the polish dries so it doesn’t take any polish with it.)
The secret to the sharp lines of this manicure is Scotch tape. Grab a roll and tear off a few nail bed-sized pieces of tape. Before applying them to the nail, take each piece and press it against your palm several times to remove most of the stickiness. Then, once the first coat is dry, place a de-stickified piece of tape at a diagonal angle across each nail. Next, grab the dark color and paint each nail again. You’ll be painting partially over the nail and partially over the tape. When you’re done, gently remove the pieces of tape and let the polish dry. (Make sure to remove the tape before the polish dries so it doesn’t take any polish with it.)
Step 4: Tape and Repeat
Once the second polish is dry, de-stickify ten new pieces of tape and place them across your nails at new angles. You can use one, or even two different pieces of tape to reach the desired pattern. Cutting shapes out of the tape is also a good trick to try.
Once the second polish is dry, de-stickify ten new pieces of tape and place them across your nails at new angles. You can use one, or even two different pieces of tape to reach the desired pattern. Cutting shapes out of the tape is also a good trick to try.
Step 5: Final Layer
Once the second polish is dry, de-stickify a bunch of new pieces of tape and place them across your nails at new angles. Follow with your darkest polish, and remove the tape before it dries.
Once the second polish is dry, de-stickify a bunch of new pieces of tape and place them across your nails at new angles. Follow with your darkest polish, and remove the tape before it dries.
Step 6: Wait and Seal
Once the final coat is dry, seal the look with your favorite topcoat to protect the polish and make it shine.
Once the final coat is dry, seal the look with your favorite topcoat to protect the polish and make it shine.
Final Thoughts: Get Creative
Once you’ve mastered the basic technique of using the tape to create clean lines, experiment with other fun shapes, or try a manicure with four or more colors. You can place the tape at the same angle to create a uniform pattern, or mix it up to make every nail unique.
Once you’ve mastered the basic technique of using the tape to create clean lines, experiment with other fun shapes, or try a manicure with four or more colors. You can place the tape at the same angle to create a uniform pattern, or mix it up to make every nail unique.
Colors Used
Tutorial
Zoya Minka
OPI I Vant to be A-Lone Star
OPI Brisbane Bronze
Example A
Zoya Minka
Zoya Mia
Julep Maria
Example B
Essie Mint Candy Apple
China Glaze Peachy Keen
China Glaze Wicked Style
Example C
OPI I Vant to be A-Lone Star
OPI Dutch Ya Just Love OPI
China Glaze Poetic
First image provided by abullseyeview.com. Tutorial created by abullseyeview.com (I love Target). Original tutorial sent to me with minor edits done by myself. This is not a sponsored post.
What do you think? Would you try this look out?

hellocotton | facebook | pinterest | google+ | twitter | bloglovin'


No comments :
Post a Comment